In this module it’s possible to plan several workflows from one or more production orders. The manufacturing schedule can be transmitted gradually or complete to the assigned output device (scanner, browser, label printer) of the working station. After processing of every working step a response is send to the planning module, so that the current working state of the order can be viewed in ingenious.V12.
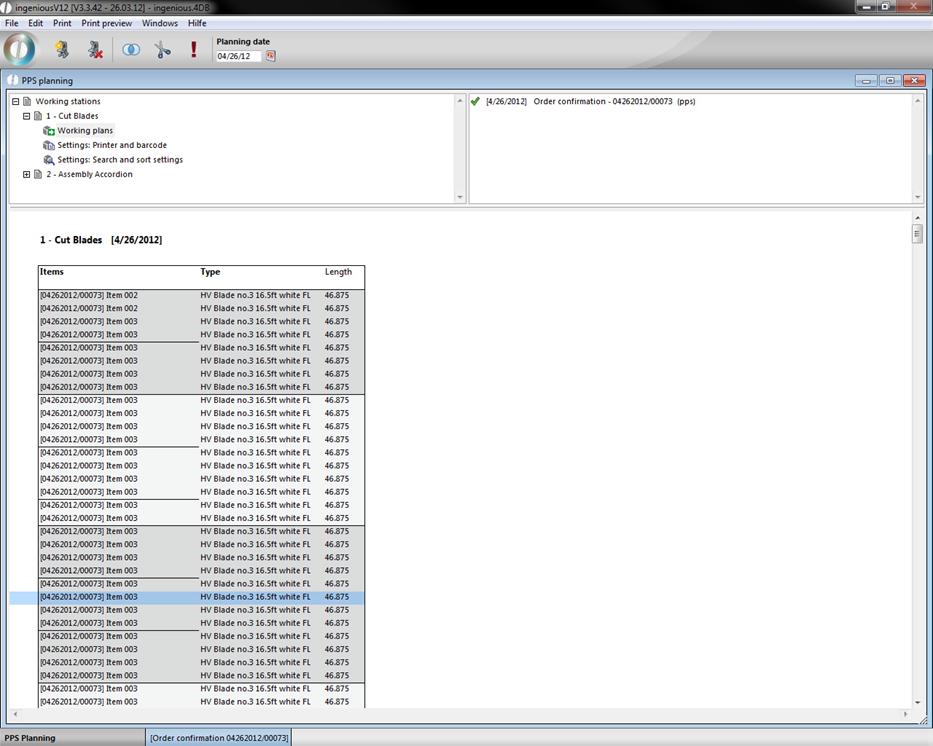
The module consists of 3 main parts. In the left upper corner you find a list of all working station and the configuration possibilities. The list in the right upper corner shows all projects containing incomplete working steps (pps items) for the selected work station at the adjusted planning date. In the bottom area a listing of the pps positions is displayed.
Icon bar
![]() Create new work station
Create new work station
![]() Delete work station
Delete work station
![]() Group selected pps items
Group selected pps items
![]() Sort per cutting optimization
Sort per cutting optimization
![]() Toggle finish/release current plan
Toggle finish/release current plan
Working station list
1. Working plans:
For the adjusted day the daily plan, all pps items and assigned projects will be loaded. If a daily plan is loaded for the first time, the pps items will be sorted corresponding to the settings (see 3.).

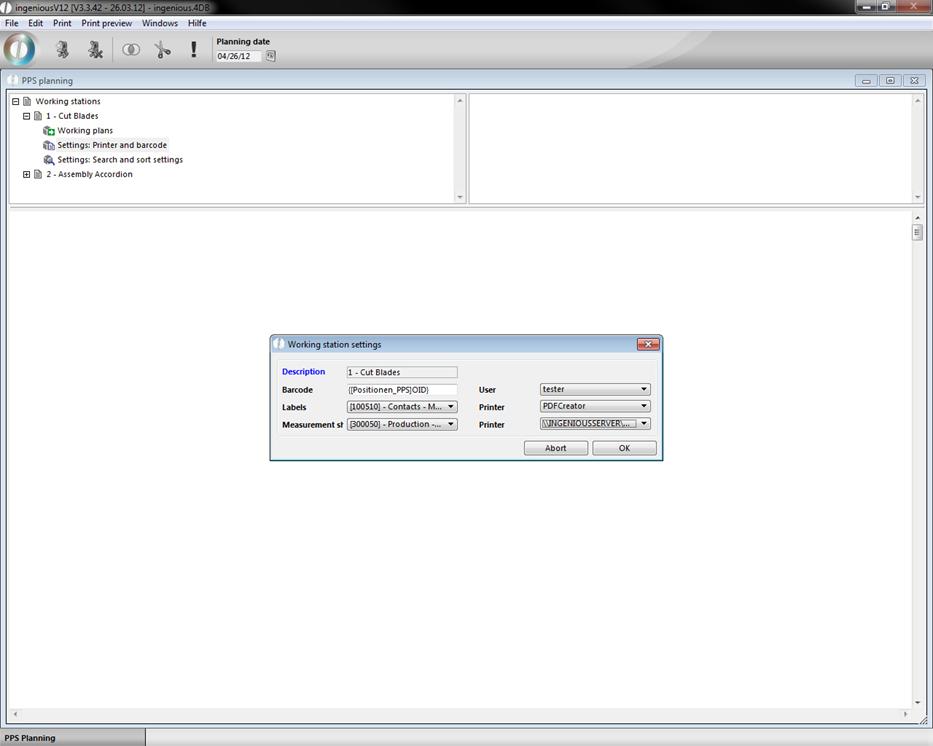
2. Settings: Printer and barcode:
A configuration window will open up, where you can adjust the barcode, user and print reports. Thereby you only have to define the values that will be used later. When you want to use a scanner you have to enter a value in the field “barcode”. The barcode consists of free texts and place holders {…}. The place holders can be ingenious.V12 project-, item placeholder or field names. If you want to print labels on completing a pps item, a label printer hast to be chosen. If you want to print measurement sheets with the help of a button on a web site, the area “measurement sheet” has to be filled.
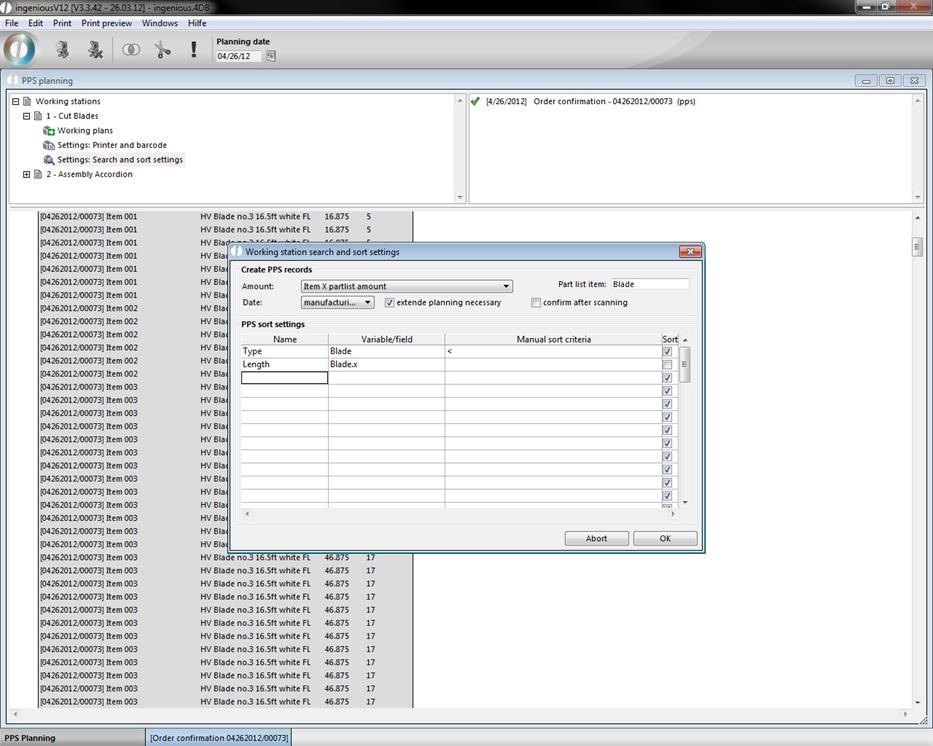
3. Settings: Search and sort settings:
By double clicking this entry, the configuration window will be shown, where you can define the count of the created pps items and the columns for the automatic sorting. PPS items can be created per project, per item, per part list item or per part list item X item quantity. For the sort orientation you have to enter the identifier and the part list variable name or the project field. It is necessary to manually adjust the sort orientation for a few parameters. Possible declarations are “<” for descending or “>” for ascending sorting. When you don’t want to use a column for sorting, uncheck the checkbox in the sort column. The execution time of the pps item is defined in the field “date”. When in a project this date is defined and the project is marked as reserved or stock posted, the pps items will be created on saving of the project. If you undo these adjustments the pps items will be deleted (except they were already processed). The following two check boxes “extend planning necessary” and “confirm after scanning” are important for special pps solutions. If these two boxes both are unchecked, then the pps items are designated for the regular scanner mode. The order of work steps is given by the scan order and by scanning an item it will be marked as completed. If “confirm after scanning” is checked, then the pps items will be temporary marked when they are scanned and can be undone or accepted after a further integrity check. When “extend planning necessary” is checked, the planning will happen according to the order in the pps list (see following part) and the pps information can then be send successive to the label printer without scanning them, for instance by clicking a button on a website.
Project list
The project list lists all projects containing pps items for the chosen day. By double clicking a project the pps items of this project can be deactivated und reactivated. Deactivated pps items cannot be scanned or planned and are not shown in the pps item list. You can deactivate a project only, if no pps item from this project was handled.
PPS item list
The pps item list shows a listing of all pps items for the selected work station and date. The columns arise out of the configurations in the part “Settings: Search and sort settings” of the work station. The first column is always the project or item number. The color of the item marks the state of the item. Green pps item are already handled, black are not.
When “confirm after scanning” is checked, the pps items will get orange after scanning, that means that they are temporary planned. By clicking a button in a web browser or the ![]() button the pps item will be completed and colored green (handled). If the scanning is undone the pps item will colored in black again (unhandled).
button the pps item will be completed and colored green (handled). If the scanning is undone the pps item will colored in black again (unhandled).
When “extend planning necessary” is checked the pps item list additionally can be grouped and sorted. The first initial group is done automatically with the column configurations. Thereby similar or equal pps items can be summarized. The groups are represented by different background colors and borders. After defining the groups it is possible to resort the pps items in a group with the help of the cutting optimization. The cutting optimization ![]() is only possible with length items. If the planning of the order is ready, the plan has to be completed by clicking
is only possible with length items. If the planning of the order is ready, the plan has to be completed by clicking ![]() . Thereby the pps items in the list view will be colored grey and are released for production.
. Thereby the pps items in the list view will be colored grey and are released for production.
You can undo the completion and regroup and resort the items. This is only possible in groups that are completely unhandled. If one or more pps items of a group are handled, the group cannot be resorted and regrouped and has to be handled completely.
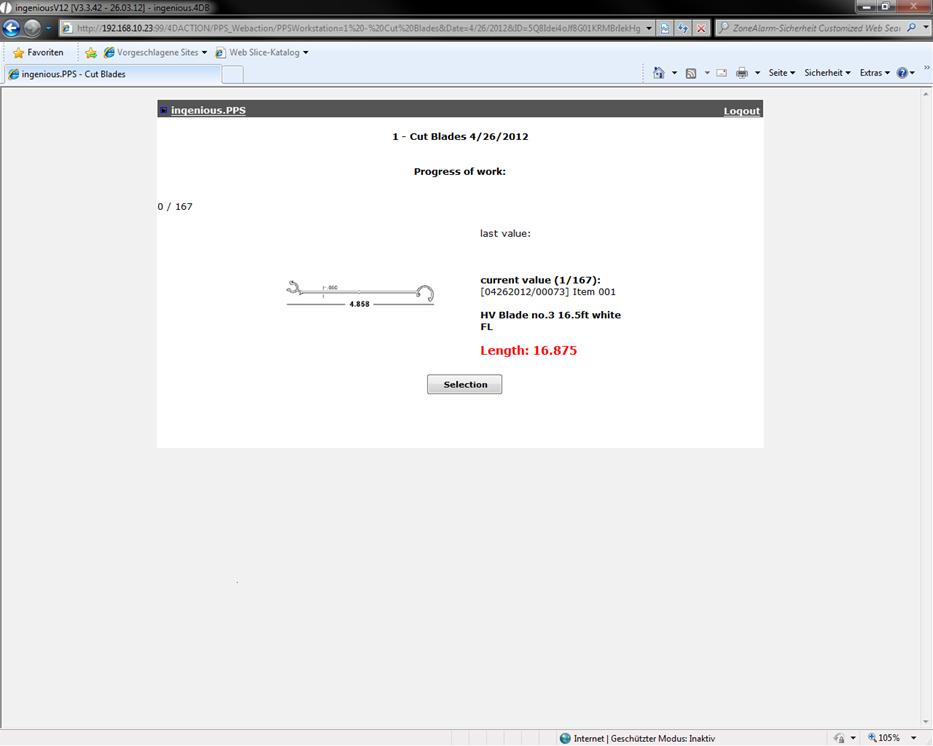
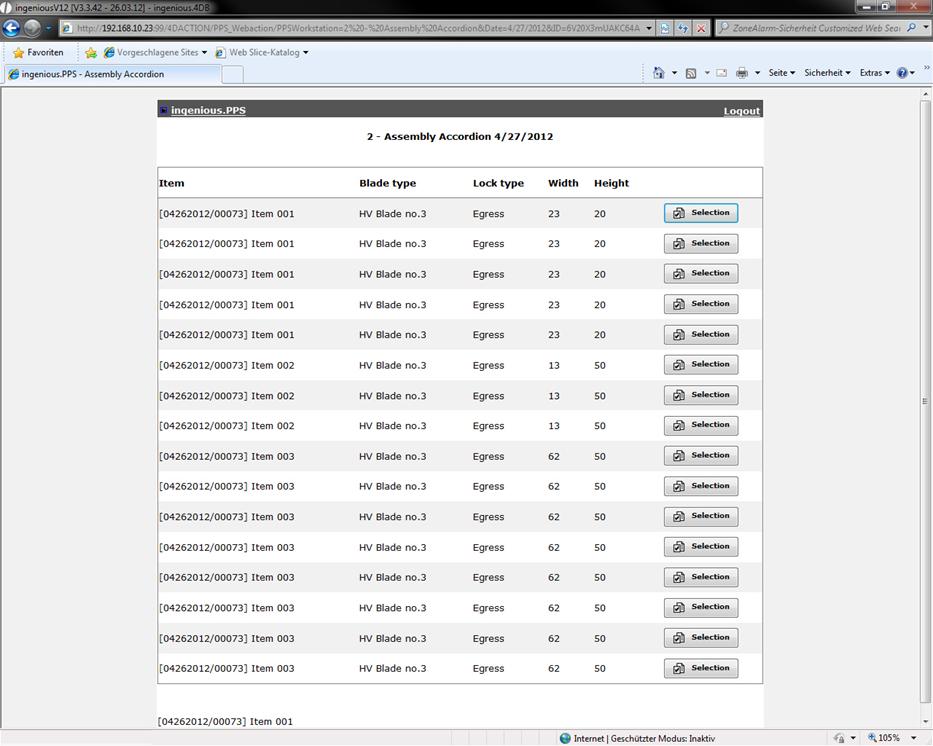
Processing the pps items in the web browser
To process pps items in the web browser, special html templates have to be lodged in the ingenious.v12 web administration. You can start the web administration by clicking the button “web administration” in the program settings in the category “web server”. There you can add several default templates (for printing, scanning, or error output) and individual templates per working station.
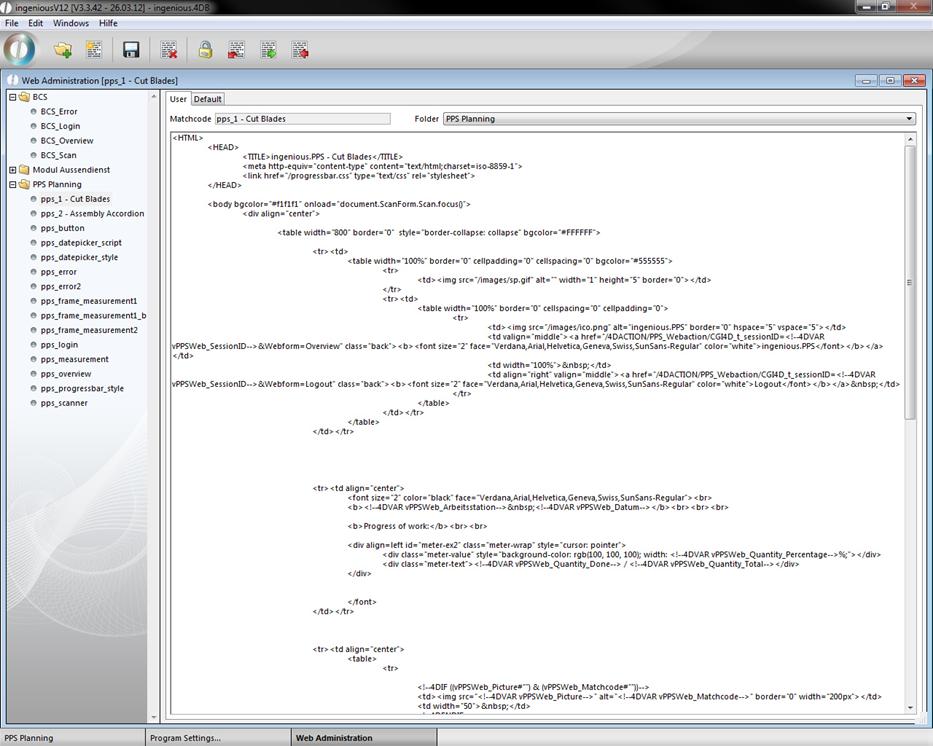
Depending on requirements different information can be displayed and/or edited.
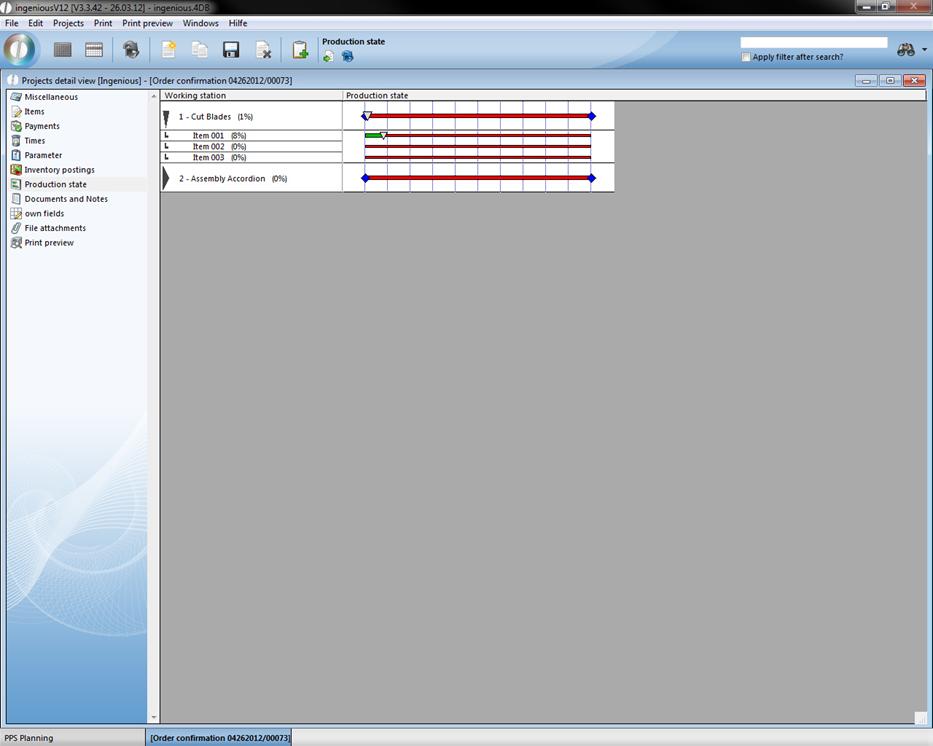
View pps items in projects
In projects with pps items the production state can be viewed in the category “Production stat”. The pps items can be grouped by working station or items and can be refreshed.
Print report in the pps module
There is a default report for the pps item list. Additionally you can create custom print reports in the program settings. Useful report types are part list labels (type 4), consignment labels (type 5) and hmReports (type 16). The printouts direct at the selected pps items.